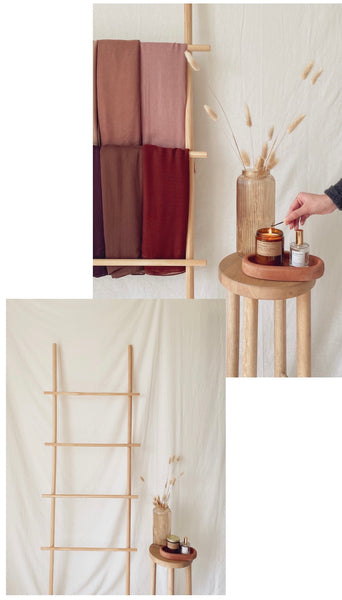
We’re always looking for new ways to organize our scarves and wardrobe - this DIY is a great way to turn hijab organization into a minimalist decor piece you’ll want to display around your home! This is super simple to make and helps keep your Vela collection as wrinkle-free as when you bought them.

What you’ll need:
- (2) 3/4 inches x 72 inches wood dowels (this is for sides of the ladder; this will vary based on how tall you want your ladder to be)
- (2) 3/4 inches x 48 inches wood dowels, cut in half to have (4) 24-inch pieces (this is for the rungs of the ladder; this will vary based on how wide you want your ladder to be)
- Wood screws or nails
- Wood glue (optional)
- Drill
- Measuring tape
*Note: Home Depot and Lowes (in the U.S.) can make free cuts for you, so no additional tools are needed.
Directions:
- Lay out your dowels to see how much space you want to leave at the top and bottom, and between each rung of the ladder. We chose 12 inches between each rung to make sure each row had enough space
-
Mark how much overhang you want with each rung. We chose 3 inches, so we could also hang tote bags or accessories off the side

- Mark where the dowels overlap to see where your nail will go
-
Flip ladder over to pre-drill (rungs under) before adding screws or nails. This is where you can add a drop of wood glue beforehand to make sure it’s extra secure

- Flip the ladder over and now you have a seamless frontside where the rungs and ladder sides meet
- Prop against any wall in your home to hang your Vela collection and accessories!
 Optional: You can also stain or paint your ladder, but we opted to keep the original color of light pine wood! If you want to make this without any tools, you can also use rope or twine to create a knot like this one to hold the dowels secure, or use wood glue with a clamp to make sure it dries securely.


Leave a comment